


Color blocking looks really chic and trendy. It is in fashion and you will see many people sporting it, fashionistaâs will swear by it. Be your style quirky or feminine, they go with both types of do. What is great about color blocking is that it reduces the hassle of matches your nail color to outfits every single time. Generally, one a single hue on the nails is worn then you have to look for garments that go with it. Also, it is difficult to carry the nail enamel for more than a couple of days as it is bound to clash with some outfit or the other. Color blocked nails look much better as they blend well with several outfits, you can wear them for the entire week without sweeping your nails clean of the colored paint. This all new spring trend puts new life in your nails. In fact, wearing solid colors can make you look quite dated. To look youthful, fresh and vivacious wear conflicting bright colors that pop out.
1. Decide how to color in
Color blocking your nails is not all that difficult. Decide how you want to go about your color blocking. There are many ways in which you can wear shades to make them clash with each other. First, you can paint every single nail in a different color. So each finger nail has a different color. You can make patterns on your nails like stripes, boxes, V incisions, dots, etc. You can also color your nails in bands of different hues either lengthwise or along the breadth. Stripes or bands can be done horizontally, vertically or diagonally. Another great idea is to just color the outer tip of your nail in a hue that contrasts with the nail enamel on the base. Patterns of start, cherries or fruits are quite perky. Add a chilling touch with skulls, cross bones, and winged bats. Tweens can go for smiley faces and eyes popping out on their nails.
2. Pick the hues carefully
The basic principle of color blocking is to wear colors that contrast, you have to do just the same with your nails. Do not pick similar looking colors instead go for shades that stand out against each other. They should be enticing and grab attention. But picking dull or light hues that contrast is no good. In color blacking, the hues should look prominent. The colors should be saturated and deep. Loud colors that dazzle and command attention are a must. With cool tones tones, you can add a silvery gleam to your nails. But if you choose warmers shades for color blocking, then paint a daub of golden also.
3. Some terrific combos
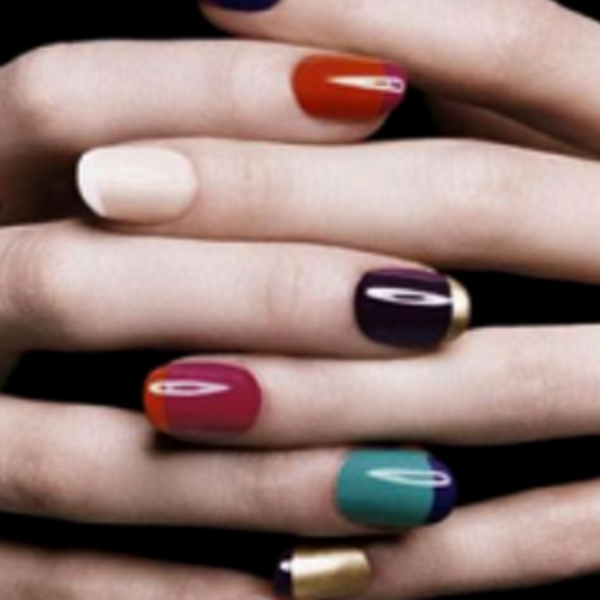
Combine neutrals hues with bright pops of red, green and blue. You can also complement neons with subtle hues or neutrals. Try traditional color combinations that have always been a favorite. Pink and blue co-ordinate well while pick with red makes quite a statement. You can also apply green and purple together on your nails. Purple with orange is a good twist. Green and blue, blue and white, red and sunny yellow, red and green are very good ideas. Go gothic by combining violet, crimson, and black together. Olive green with mustard yellow is also jazzy. Cobalt blue and minty green is another groovy mix. Use shades of brown, tan, red, and orange together on the nails.
4. Use stick on tape
You can use strips of scotch tape to color block he nails. You just need to adhere these strips on your fingernails. Then paint the nails with the strips glues on. This helps to prevent smudges and the paint comes out really neat. You can also cover the design made by one paint color with the tape. After the design has been secured with a tape over it, start coloring nails with the second hue. There are only straight and clear lines and no blotching. After you are done, remove the tape from your fingers. Clean out any color along the sides.
5. Let them dry
After coloring nails, give them sufficient time to dry out. The best way is to apply one color at a time. Pick one hues and coat your nails with it. If you need two coats for the color to come out, do that. Only after the first color has dried, start applying the other hues. Repeat the process for the next color also. Only when the preceding color has dried out completely can you apply the next shade on your nails.